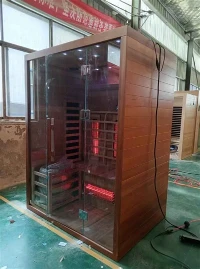
Delivery Sign-Off and Unpacking Verification
Saunas are large, custom-built units that go through long international shipping routes with multiple transfer points. Minor scuffs on the outer packaging during transit are normal, but if you spot severe dents, punctures or large water-soaked areas, you must start the anomaly verification process immediately.
Before signing for the delivery, complete all checks alongside the courier staff. First confirm there is no heavy damage on the outer package that could harm internal components, then open the box and cross-reference every item against the included packing list. Make sure all main wall panels, heating unit, temperature control components, sealing accessories, specialized fasteners and installation manuals are accounted for, before you finalize the sign-off.
If you find damaged or missing parts, take high-resolution photos of the broken component, the full outer packaging and the shipping waybill right away, and submit them to the brand's dedicated customer service channel.
Site and Pre-Installation Condition Confirmation
Before you start the formal installation work, verify the site and supporting conditions in advance to avoid rework halfway through the process:
1. Load Bearing Check: A standard residential indoor sauna carries around 200 to 300kg per square meter. If you plan to place the unit on the second floor or higher, confirm in advance that the floor load capacity meets the equipment requirements. We also recommend laying a dedicated waterproof underlay on the ground, to prevent condensate leakage that could damage surrounding facilities over long-term use.
2. Electrical System Compatibility: Sauna heating units usually have a rated power between 6000W and 9000W. You need to run a separate dedicated power circuit with residual current protection directly from your home distribution system. Never share this circuit with other high-power appliances, to avoid safety hazards like circuit overload or unexpected tripping.
3. Space Planning: Leave no less than 5cm of clearance on all four sides based on the official outer dimensions of the sauna. This buffer space accommodates the thermal expansion of wood when heated, and also makes daily maintenance much easier. Plan your ventilation system in advance: place the air inlet at the low position under the heater, and reserve the exhaust outlet at a high point on the opposite diagonal of the space, to ensure smooth air circulation during operation.
Standardized Installation Procedure
Follow the official installation manual step by step, and pay close attention to these specifications in core stages:
1. First assemble the bottom support frame, lay the matching waterproof underlay, and adjust the ground to a gentle slope of no more than 2% toward the pre-set drainage point. This ensures condensate flows naturally, and prevents standing water that leads to mold growth.
2. For wall installation, first seal and lay the inner tin foil insulation layer, then fasten each sauna-specific wood panel layer by layer. Use the included sliding fasteners to secure the panels - you do not need to lock them fully tight, to leave buffer room for the wood's natural deformation during temperature and humidity cycles.
3. After installing the high-temperature resistant double-layer glass door, confirm the self-expanding sealing strip fits evenly along the door gap, with no obvious light leaks when the door is closed. This prevents massive hot air leakage during operation, which would otherwise reduce heating efficiency.
4. After you finish wiring the heating unit and temperature control system, insulate and waterproof all wire joints. Do not close the outer decorative panels yet. Run a 15-minute no-load test first, confirm the heater warms up normally, the thermostat starts and stops accurately, and the emergency power-off device responds effectively. Only then can you complete the remaining assembly steps.
Commissioning and First-Use Specifications
Do not enter the sauna immediately after full assembly. Complete a gradient heating debug first: set the device to slow heating mode, and let the temperature rise gradually to the regular working level over 15 to 20 minutes. Observe the unit throughout the process, confirm there is no abnormal noise, no overheating circuits, the ventilation system runs properly, and indoor air indicators stay within the safe range.
Before your first use, wipe all wood surfaces with a soft cloth and neutral detergent, to remove floating dust and processing residue left during installation. Limit the first running session to under 20 minutes, so the wooden structure can gradually adapt to the high-temperature and high-humidity environment. You can then adjust the session length later to match your personal usage habits.
If you run into issues with part fitting or circuit debugging during installation, you can always contact the brand's technical support team. Remote video guidance can resolve the vast majority of common problems, and there is no need to book an extra paid on-site service.